

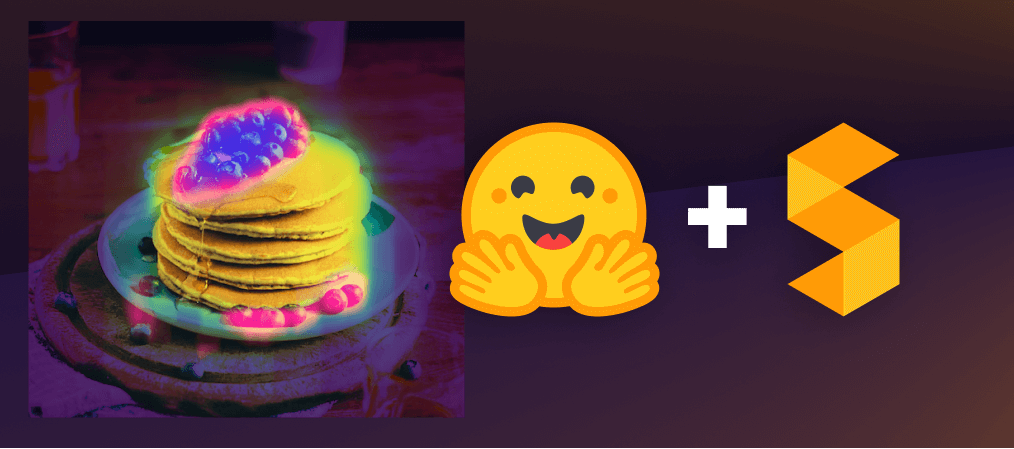

This guide shows how you can use CLIPSeg, a zero-shot image segmentation model, using 🤗 transformers. CLIPSeg creates rough segmentation masks that can be used for robot perception, image inpainting, and many other tasks. If you need more precise segmentation masks, we’ll show how you can refine the results of CLIPSeg on Segments.ai.
Image segmentation is a well-known task within the field of computer vision. It allows a computer to not only know what is in an image (classification), where objects are in the image (detection), but also what the outlines of those objects are. Knowing the outlines of objects is essential in fields such as robotics and autonomous driving. For example, a robot has to know the shape of an object to grab it correctly. Segmentation can also be combined with image inpainting to allow users to describe which part of the image they want to replace.
One limitation of most image segmentation models is that they only work with a fixed list of categories. For example, you cannot simply use a segmentation model trained on oranges to segment apples. To teach the segmentation model an additional category, you have to label data of the new category and train a new model, which can be costly and time-consuming. But what if there was a model that can already segment almost any kind of object, without any further training? That’s exactly what CLIPSeg, a zero-shot segmentation model, achieves.
Currently, CLIPSeg still has its limitations. For example, the model uses images of 352 x 352 pixels, so the output is quite low-resolution. This means we cannot expect pixel-perfect results when we work with images from modern cameras. If we want more precise segmentations, we can fine-tune a state-of-the-art segmentation model, as shown in our previous blog post. In that case, we can still use CLIPSeg to generate some rough labels, and then refine them in a labeling tool such as Segments.ai. Before we describe how to do that, let’s first take a look at how CLIPSeg works.
CLIP: the magic model behind CLIPSeg
CLIP, which stands for Contrastive Language–Image Pre-training, is a model developed by OpenAI in 2021. You can give CLIP an image or a piece of text, and CLIP will output an abstract representation of your input. This abstract representation, also called an embedding, is really just a vector (a list of numbers). You can think of this vector as a point in high-dimensional space. CLIP is trained so that the representations of similar pictures and texts are similar as well. This means that if we input an image and a text description that fits that image, the representations of the image and the text will be similar (i.e., the high-dimensional points will be close together).
At first, this might not seem very useful, but it is actually very powerful. As an example, let’s take a quick look at how CLIP can be used to classify images without ever having been trained on that task. To classify an image, we input the image and the different categories we want to choose from to CLIP (e.g. we input an image and the words “apple”, “orange”, …). CLIP then gives us back an embedding of the image and of each category. Now, we simply have to check which category embedding is closest to the embedding of the image, et voilà! Feels like magic, doesn’t it?
What’s more, CLIP is not only useful for classification, but it can also be used for image search (can you see how this is similar to classification?), text-to-image models (DALL-E 2 is powered by CLIP), object detection (OWL-ViT), and most importantly for us: image segmentation. Now you see why CLIP was truly a breakthrough in machine learning.
The reason why CLIP works so well is that the model was trained on a huge dataset of images with text captions. The dataset contained a whopping 400 million image-text pairs taken from the internet. These images contain a wide variety of objects and concepts, and CLIP is great at creating a representation for each of them.
CLIPSeg: image segmentation with CLIP
CLIPSeg is a model that uses CLIP representations to create image segmentation masks. It was published by Timo Lüddecke and Alexander Ecker. They achieved zero-shot image segmentation by training a Transformer-based decoder on top of the CLIP model, which is kept frozen. The decoder takes in the CLIP representation of an image, and the CLIP representation of the thing you want to segment. Using these two inputs, the CLIPSeg decoder creates a binary segmentation mask. To be more precise, the decoder doesn’t only use the final CLIP representation of the image we want to segment, but it also uses the outputs of some of the layers of CLIP.
The decoder is trained on the PhraseCut dataset, which contains over 340,000 phrases with corresponding image segmentation masks. The authors also experimented with various augmentations to expand the size of the dataset. The goal here is not only to be able to segment the categories that are present in the dataset, but also to segment unseen categories. Experiments indeed show that the decoder can generalize to unseen categories.
One interesting feature of CLIPSeg is that both the query (the image we want to segment) and the prompt (the thing we want to segment in the image) are input as CLIP embeddings. The CLIP embedding for the prompt can either come from a piece of text (the category name), or from another image. This means you can segment oranges in a photo by giving CLIPSeg an example image of an orange.
This technique, which is called “visual prompting”, is really helpful when the thing you want to segment is hard to describe. For example, if you want to segment a logo in a picture of a t-shirt, it’s not easy to describe the shape of the logo, but CLIPSeg allows you to simply use the image of the logo as the prompt.
The CLIPSeg paper contains some tips on improving the effectiveness of visual prompting. They find that cropping the query image (so that it only contains the object you want to segment) helps a lot. Blurring and darkening the background of the query image also helps a little bit. In the next section, we’ll show how you can try out visual prompting yourself using 🤗 transformers.
Using CLIPSeg with Hugging Face Transformers
Using Hugging Face Transformers, you can easily download and run a
pre-trained CLIPSeg model on your images. Let’s start by installing
transformers.
!pip install -q transformers
To download the model, simply instantiate it.
from transformers import CLIPSegProcessor, CLIPSegForImageSegmentation

processor = CLIPSegProcessor.from_pretrained("CIDAS/clipseg-rd64-refined")
model = CLIPSegForImageSegmentation.from_pretrained("CIDAS/clipseg-rd64-refined")
Now we can load an image to try out the segmentation. We’ll choose a
picture of a delicious breakfast taken by Calum
Lewis.
from PIL import Image
import requests

url = "https://unsplash.com/photos/8Nc_oQsc2qQ/download?ixid=MnwxMjA3fDB8MXxhbGx8fHx8fHx8fHwxNjcxMjAwNzI0&force=true&w=640"
image = Image.open(requests.get(url, stream=True).raw)
image
Text prompting
Let’s start by defining some text categories we want to segment.
prompts = ["cutlery", "pancakes", "blueberries", "orange juice"]
Now that we have our inputs, we can process them and input them to the
model.
import torch

inputs = processor(text=prompts, images=[image] * len(prompts), padding="max_length", return_tensors="pt")

with torch.no_grad():
  outputs = model(**inputs)
preds = outputs.logits.unsqueeze(1)
Finally, let’s visualize the output.
import matplotlib.pyplot as plt

_, ax = plt.subplots(1, len(prompts) + 1, figsize=(3*(len(prompts) + 1), 4))
[a.axis('off') for a in ax.flatten()]
ax[0].imshow(image)
[ax[i+1].imshow(torch.sigmoid(preds[i][0])) for i in range(len(prompts))];
[ax[i+1].text(0, -15, prompt) for i, prompt in enumerate(prompts)];
Visual prompting
As mentioned before, we can also use images as the input prompts (i.e.
in place of the category names). This can be especially useful if it’s
not easy to describe the thing you want to segment. For this example,
we’ll use a picture of a coffee cup taken by Daniel
Hooper.
url = "https://unsplash.com/photos/Ki7sAc8gOGE/download?ixid=MnwxMjA3fDB8MXxzZWFyY2h8MTJ8fGNvZmZlJTIwdG8lMjBnb3xlbnwwfHx8fDE2NzExOTgzNDQ&force=true&w=640"
prompt = Image.open(requests.get(url, stream=True).raw)
prompt
We can now process the input image and prompt image and input them to
the model.
encoded_image = processor(images=[image], return_tensors="pt")
encoded_prompt = processor(images=[prompt], return_tensors="pt")

with torch.no_grad():
  outputs = model(**encoded_image, conditional_pixel_values=encoded_prompt.pixel_values)
preds = outputs.logits.unsqueeze(1)
preds = torch.transpose(preds, 0, 1)
Then, we can visualize the results as before.
_, ax = plt.subplots(1, 2, figsize=(6, 4))
[a.axis('off') for a in ax.flatten()]
ax[0].imshow(image)
ax[1].imshow(torch.sigmoid(preds[0]))
Let’s try one last time by using the visual prompting tips described in
the paper, i.e. cropping the image and darkening the background.
url = "https://i.imgur.com/mRSORqz.jpg"
alternative_prompt = Image.open(requests.get(url, stream=True).raw)
alternative_prompt
encoded_alternative_prompt = processor(images=[alternative_prompt], return_tensors="pt")

with torch.no_grad():
  outputs = model(**encoded_image, conditional_pixel_values=encoded_alternative_prompt.pixel_values)
preds = outputs.logits.unsqueeze(1)
preds = torch.transpose(preds, 0, 1)
_, ax = plt.subplots(1, 2, figsize=(6, 4))
[a.axis('off') for a in ax.flatten()]
ax[0].imshow(image)
ax[1].imshow(torch.sigmoid(preds[0]))
In this case, the result is pretty much the same. This is probably
because the coffee cup was already separated well from the background in
the original image.
Using CLIPSeg to pre-label images on Segments.ai
As you can see, the results from CLIPSeg are a little fuzzy and very
low-res. If we want to obtain better results, you can fine-tune a
state-of-the-art segmentation model, as explained in our previous
blogpost. To finetune
the model, we’ll need labeled data. In this section, we’ll show you
how you can use CLIPSeg to create some rough segmentation masks and then
refine them on
Segments.ai,
a labeling platform with smart labeling tools for image segmentation.
First, create an account at
https://segments.ai/join
and install the Segments Python SDK. Then you can initialize the
Segments.ai Python client using an API key. This key can be found on
the account page.
!pip install -q segments-ai
from segments import SegmentsClient
from getpass import getpass

api_key = getpass('Enter your API key: ')
segments_client = SegmentsClient(api_key)
Next, let’s load an image from a dataset using the Segments client.
We’ll use the a2d2 self-driving
dataset. You can also create your
own dataset by following these
instructions.
samples = segments_client.get_samples("admin-tobias/clipseg")


sample = samples[1]
image = Image.open(requests.get(sample.attributes.image.url, stream=True).raw)
image
We also need to get the category names from the dataset attributes.
dataset = segments_client.get_dataset("admin-tobias/clipseg")
category_names = [category.name for category in dataset.task_attributes.categories]
Now we can use CLIPSeg on the image as before. This time, we’ll also
scale up the outputs so that they match the input image’s size.
from torch import nn

inputs = processor(text=category_names, images=[image] * len(category_names), padding="max_length", return_tensors="pt")


with torch.no_grad():
  outputs = model(**inputs)


preds = nn.functional.interpolate(
    outputs.logits.unsqueeze(1),
    size=(image.size[1], image.size[0]),
    mode="bilinear"
)
And we can visualize the results again.
len_cats = len(category_names)
_, ax = plt.subplots(1, len_cats + 1, figsize=(3*(len_cats + 1), 4))
[a.axis('off') for a in ax.flatten()]
ax[0].imshow(image)
[ax[i+1].imshow(torch.sigmoid(preds[i][0])) for i in range(len_cats)];
[ax[i+1].text(0, -15, category_name) for i, category_name in enumerate(category_names)];
Now we have to combine the predictions to a single segmented image.
We’ll simply do this by taking the category with the greatest sigmoid
value for each patch. We’ll also make sure that all the values under a
certain threshold do not count.
threshold = 0.1

flat_preds = torch.sigmoid(preds.squeeze()).reshape((preds.shape[0], -1))


flat_preds_with_treshold = torch.full((preds.shape[0] + 1, flat_preds.shape[-1]), threshold)
flat_preds_with_treshold[1:preds.shape[0]+1,:] = flat_preds


inds = torch.topk(flat_preds_with_treshold, 1, dim=0).indices.reshape((preds.shape[-2], preds.shape[-1]))
Let’s quickly visualize the result.
plt.imshow(inds)
Lastly, we can upload the prediction to Segments.ai. To do that, we’ll
first convert the bitmap to a png file, then we’ll upload this file to
the Segments, and finally we’ll add the label to the sample.
from segments.utils import bitmap2file
import numpy as np

inds_np = inds.numpy().astype(np.uint32)
unique_inds = np.unique(inds_np).tolist()
f = bitmap2file(inds_np, is_segmentation_bitmap=True)

asset = segments_client.upload_asset(f, "clipseg_prediction.png")

attributes = {
      'format_version': '0.1',
      'annotations': [{"id": i, "category_id": i} for i in unique_inds if i != 0],
      'segmentation_bitmap': { 'url': asset.url },
  }

segments_client.add_label(sample.uuid, 'ground-truth', attributes)
If you take a look at the uploaded prediction on
Segments.ai,
you can see that it’s not perfect. However, you can manually correct
the biggest mistakes, and then you can use the corrected dataset to
train a better model than CLIPSeg.
Conclusion
CLIPSeg is a zero-shot segmentation model that works with both text and image prompts. The model adds a decoder to CLIP and can segment almost anything. However, the output segmentation masks are still very low-res for now, so you’ll probably still want to fine-tune a different segmentation model if accuracy is important.
Note that there’s more research on zero-shot segmentation currently being conducted, so you can expect more models to be added in the near future. One example is GroupViT, which is already available in 🤗 Transformers. To stay up to date with the latest news in segmentation research, you can follow us on Twitter: @TobiasCornille, @NielsRogge, and @huggingface.
If you’re interested in learning how to fine-tune a state-of-the-art segmentation model, check out our previous blog post: https://huggingface.co/blog/fine-tune-segformer.
